
Working hours: Mon–Sat, 9:00 to 18:00. Orders accepted online: 24/7
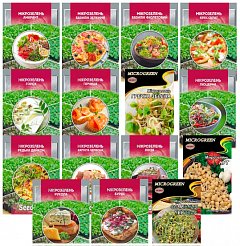
Microgreen seeds: Peas, 20 g, Seedera

UAH 20.40
Microgreen seeds: Peas, 20 g, Seedera
Quantity
Full description
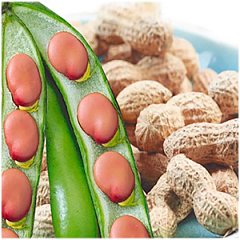
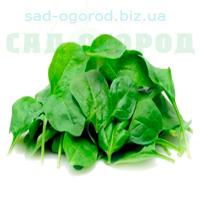
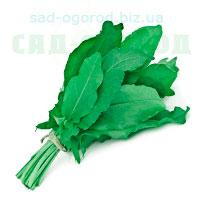
Pea Microgreens
ORGANIC SEEDS FOR GROWING MICROGREENS AT HOME
Microgreens can be grown at home all year round. Young greens in the early stages of development have a number of unique properties that mature plants lack. Plants at the microgreen stage contain 40 times more nutrients than mature plants. Microgreens are easily digestible, help regulate digestion, protect the body from the harmful effects of free radicals, significantly increase endurance and performance, and add a spicy kick to dishes. Pea microgreens consist of young leaves, stems, and tendrils. All parts of the plant are edible. Pea microgreens have a slightly sweet taste with a mild nutty aftertaste. They are rich in ascorbic acid, various vitamins, carotene, fiber, and chlorophyll. They reduce the risk of cancer, heart attacks, and hypertension, and slow down the skin’s aging process. In cooking, they are added to soups, sandwiches, salads, and other dishes.
Agricultural TechnologyWeight: 20 g
Method 1. In soil.
1. Fill the tray with 4–5 cm of soil; the sides should remain high enough to hold the seedlings.
2. Spread the seeds over the soil surface and lightly tamp them down. Small seeds, such as broccoli, radish, arugula, and watercress, should not clump together. Large seeds should cover the entire surface.
3. Moisten the seeds with a spray bottle.
4. Cover the container and place it in a dark, warm spot for a few days (up to 5). Ventilate daily and moisten as needed. The soil mixture should be consistently moist (but not wet!)—like a wrung-out sponge.
5. After 3–5 days, stems will appear—now they’re ready to be placed on the windowsill. The more light, the better. Rotate the trays and mist with a spray bottle.
6. Harvest as soon as a few true leaves appear (2–3 cm tall).
7. You can reuse the soil. No fertilizer is needed—everything necessary is in the seeds.
Method 2. Without soil.
1. Soak the seeds in water for a few hours so they swell and germinate faster later.
2. Pour water into the bottom of the germination container. There should be 1 cm of space between the water surface and the rim of the container.
3. Cover the container with the top part—a plastic mesh. Spread the seeds of your chosen crop evenly over the mesh.
4. Spray the seeds with a spray bottle for additional moisture and place them in a warm, well-lit spot.
5. Once the seedlings have grown enough that their roots are caught in the mesh, start rinsing the greens under running water. Do this 2–3 times a day. After rinsing, don’t forget to refill the container with water so the plant roots can reach the water.
6. Harvest the young greens. Depending on the crop’s growth rate, microgreens are ready to eat in 5–10 days.
Sowing (month, depth) — year-round, 1–2 cm
Planting pattern (cm) — densely, without gaps (1–2 g/cm²)
Harvesting (month) — 7–10 days after germination
-
Seeds
 Seeds
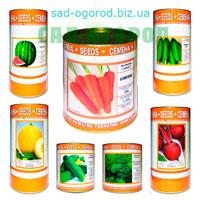
Buy seeds with a harvest guarantee at the "Sad-Ogorod" online store
Want to buy seeds with high germination rates at an affordable price? The "Sad-Ogorod" online store offers a wide selection of vegetable, herb, and melon seeds. Here you’ll find seeds for tomatoes, cucumbers, peppers, cabbage, carrots, beets, dill, parsley, lettuce, zucchini, eggplant, watermelon, melon, and other popular crops.
✅ Why is it beneficial to buy seeds from us?
✔ High-quality seeds from leading producers — consistent germination and high yields.
✔ A wide selection of proven varieties and hybrids for greenhouses and open fields.
✔ The ability to purchase seeds retail at wholesale prices.
✔ Fast delivery throughout Ukraine: Kharkiv, Kyiv, Dnipro, Odesa, Lviv, and other cities.
✔ Affordable prices, positive customer reviews, and professional advice.
We offer only proven seeds that have stood the test of time and are suitable for farmers, gardeners, and summer residents alike. Order seeds from the “Sad-Gorod” online store today and enjoy a bountiful, high-quality harvest!
📌 Go to the catalog and select seeds:
Seeds
Buy seeds with a harvest guarantee at the "Sad-Ogorod" online store
Want to buy seeds with high germination rates at an affordable price? The "Sad-Ogorod" online store offers a wide selection of vegetable, herb, and melon seeds. Here you’ll find seeds for tomatoes, cucumbers, peppers, cabbage, carrots, beets, dill, parsley, lettuce, zucchini, eggplant, watermelon, melon, and other popular crops.
✅ Why is it beneficial to buy seeds from us?
✔ High-quality seeds from leading producers — consistent germination and high yields.
✔ A wide selection of proven varieties and hybrids for greenhouses and open fields.
✔ The ability to purchase seeds retail at wholesale prices.
✔ Fast delivery throughout Ukraine: Kharkiv, Kyiv, Dnipro, Odesa, Lviv, and other cities.
✔ Affordable prices, positive customer reviews, and professional advice.
We offer only proven seeds that have stood the test of time and are suitable for farmers, gardeners, and summer residents alike. Order seeds from the “Sad-Gorod” online store today and enjoy a bountiful, high-quality harvest!
📌 Go to the catalog and select seeds:
- Mushroom mycelium
- Agricultural nonwoven fabric (spunbond)
-
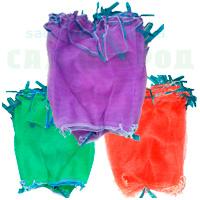
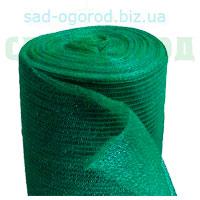
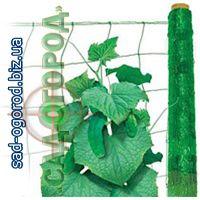
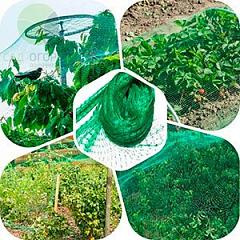
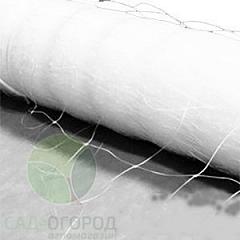
Nets
 Nets
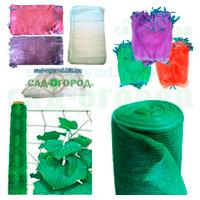
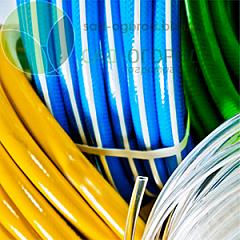
In this section, you can select and purchase various types of nets for a wide range of applications. Vegetable nets and polypropylene bags—for packaging, storing, and transporting various agricultural products—are practical and easy to use, moisture-proof, frost-resistant, cost-effective, and environmentally friendly for use with food products. Grape cluster protection nets—allow you to keep ripening grapes on the vine for a longer period, reliably protect grapes from insect pests, wasps, and birds, while preventing the berries from rotting or being damaged by hail. Cucumber netting (trellis netting) is used to support climbing plants, guide their growth, and grow vegetables vertically in open fields, achieving cost savings through more efficient use of planting areas—yields can be doubled per square meter. Shade nets—help protect vegetable and fruit crops on land plots from the scorching sun, retain moisture in the soil, allowing plants to be watered less frequently than usual, and serve as protection for plantings by shielding them from hail, rain, wind, pests, and other external factors.
Nets
In this section, you can select and purchase various types of nets for a wide range of applications. Vegetable nets and polypropylene bags—for packaging, storing, and transporting various agricultural products—are practical and easy to use, moisture-proof, frost-resistant, cost-effective, and environmentally friendly for use with food products. Grape cluster protection nets—allow you to keep ripening grapes on the vine for a longer period, reliably protect grapes from insect pests, wasps, and birds, while preventing the berries from rotting or being damaged by hail. Cucumber netting (trellis netting) is used to support climbing plants, guide their growth, and grow vegetables vertically in open fields, achieving cost savings through more efficient use of planting areas—yields can be doubled per square meter. Shade nets—help protect vegetable and fruit crops on land plots from the scorching sun, retain moisture in the soil, allowing plants to be watered less frequently than usual, and serve as protection for plantings by shielding them from hail, rain, wind, pests, and other external factors.
-
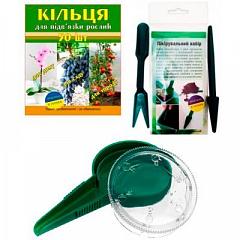
Everything for irrigation

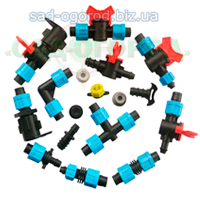
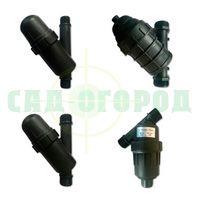
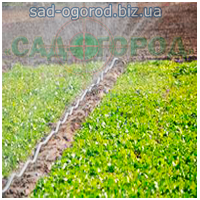
 Everything for irrigation
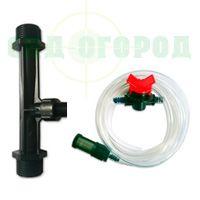
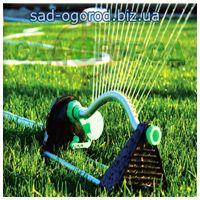
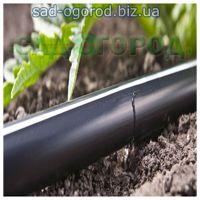
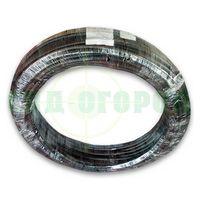
Tools and materials used for watering plants. This section of the catalog of products for your garden and vegetable garden features high-quality universal trigger sprayers—nozzles for "Rosinka"-type PET bottles, as well as pump-type sprayers. Indispensable tools for spraying any liquids (water, fertilizer solutions, pesticides, and other aggressive substances in liquid form). Convenient and simple, they are widely used both in the home and in gardening. Watering hoses—these devices are, in most cases, simply indispensable for keeping your garden or vegetable patch in good condition. You can achieve good results with watering hoses at a very low cost: a meter of the highest-quality hose is available at a very affordable price in our agricultural store. Drip irrigation is the most effective and preferred method of watering, providing a slow and even release of water with automatic regulation. This is an advanced method of watering crops, in which water is supplied in small doses through densely branched pipes and reaches the plant roots directly via special drippers. Such watering throughout the entire growing season allows you to maintain soil moisture close to the optimal level.
Everything for irrigation
Tools and materials used for watering plants. This section of the catalog of products for your garden and vegetable garden features high-quality universal trigger sprayers—nozzles for "Rosinka"-type PET bottles, as well as pump-type sprayers. Indispensable tools for spraying any liquids (water, fertilizer solutions, pesticides, and other aggressive substances in liquid form). Convenient and simple, they are widely used both in the home and in gardening. Watering hoses—these devices are, in most cases, simply indispensable for keeping your garden or vegetable patch in good condition. You can achieve good results with watering hoses at a very low cost: a meter of the highest-quality hose is available at a very affordable price in our agricultural store. Drip irrigation is the most effective and preferred method of watering, providing a slow and even release of water with automatic regulation. This is an advanced method of watering crops, in which water is supplied in small doses through densely branched pipes and reaches the plant roots directly via special drippers. Such watering throughout the entire growing season allows you to maintain soil moisture close to the optimal level.
-
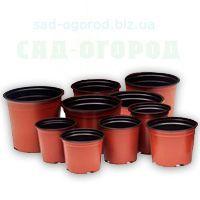
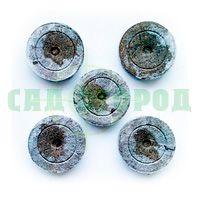
Everything for seedlings
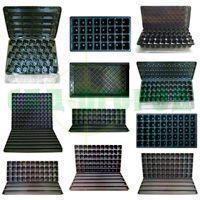
 Everything for seedlings
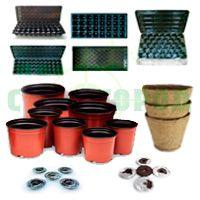
This section features effective tools for plant seedlings: greenhouses and seedling trays, pots, peat and coconut pellets. Seedling trays and greenhouses are a cost-effective and convenient way to grow your future harvest; they include a tray to retain moisture and a seedling tray. Seedling pots, available in various diameters and sizes, are used in gardening and floriculture and are designed for growing any plants, vegetable seedlings, and various ornamental plants. They are intended for both professionals and hobbyists. Peat pellets are an effective and simplified way to grow seedlings of vegetable and flower crops. By using this product for seedlings, you will find it convenient to use and achieve better results when growing any crops than with the conventional seedling method.
Everything for seedlings
This section features effective tools for plant seedlings: greenhouses and seedling trays, pots, peat and coconut pellets. Seedling trays and greenhouses are a cost-effective and convenient way to grow your future harvest; they include a tray to retain moisture and a seedling tray. Seedling pots, available in various diameters and sizes, are used in gardening and floriculture and are designed for growing any plants, vegetable seedlings, and various ornamental plants. They are intended for both professionals and hobbyists. Peat pellets are an effective and simplified way to grow seedlings of vegetable and flower crops. By using this product for seedlings, you will find it convenient to use and achieve better results when growing any crops than with the conventional seedling method.
- Insecticides
- Herbicides
- Fungicides
- Plant growth stimulants
- Plant Bioprotection
- Seed treatments
- Polyethylene film
- Adhesives
- Universal plant protection products
-
Fertilizers
- "Master" Fertilizers
- "Clean Leaf" Crystal Fertilizer 900 g
- "Plantator" Fertilizers
- "Baikal" Fertilizers
- "Helatin" Fertilizers
- "Magic Mix" Fertilizers
- "Kemira Lux" Fertilizers
- Mineral fertilizers
- Humate-based fertilizers
- "Quantum" Fertilizers
- "Stimul" Fertilizers
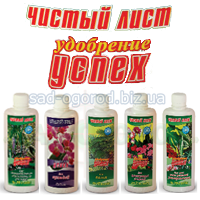
- "Clean Leaf" Plant Care Products

- "Clean Leaf" Crystal Fertilizers 20 g
- "Avangard" Fertilizers
- "Sudarushka" and "Ryazanochka" fertilizers
- "Chisty List" crystalline fertilizers, 100 g
- "Clean Leaf" Crystal Fertilizer 300 g
- "Clean Leaf" Fertilizer in Sticks
Fertilizers
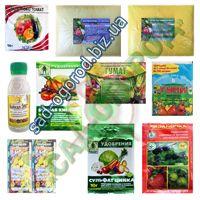
Fertilizers for your garden and vegetable garden. This product category offers our customers the best and most in-demand high-quality fertilizers for growing a wide variety of agricultural crops and plants. These are concentrated water-soluble fertilizers—granulated and universal—containing mineral, nitrogen, phosphorus, urea, sodium, calcium, and ammonium (nitrate) additives and compounds. We offer a range of fertilizers from Agrolux, Reacom, Master, and Plantafol, as well as nitrogen fertilizers such as urea and ammonium nitrate. Baikal EM1 is a concentrated, universal liquid formulation containing a large number of beneficial microorganisms that naturally inhabit the soil. The following products are in high demand and available for purchase: boric acid, potassium humate and potassium fertilizer, Ryazanochka, Sudarushka, magnesium sulfate, zinc sulfate, potassium nitrate, and the phosphorus fertilizer Superphosphate, as well as many others.
- "Master" Fertilizers
- Sprayers
- Flower pots, planters
- Gloves
- Tents
- Measures to protect against the Colorado potato beetle
- Pest control products for cockroaches, German cockroaches, bed bugs, fleas, and house and garden ants
- Protection against mosquitoes, gnats, ticks, wasps, midges, and horseflies
- Fly repellents
- Moth repellents
- Measures to protect against cabbage root maggots
- Mole control products
- Rodent Control Products
- Products for septic tanks, cesspools, and outhouses, biodegradable agents
- Household goods
- Plant protection products
- Best Sellers
- Buy seeds - bestsellers
-
Archive

- Assortment 1
- Assortment 2
- Assorted 3
- Substrates
- "Agrolyuks" Fertilizers
- Candles
- Pickling bags

- Fertilizer Application
- Seeds Professional Packaging Netherlands
- Cucumber seeds in professional packaging

- Tomato seeds in professional packaging
- Watermelon seeds in professional packaging
- Eggplant seeds in professional packaging
- Zucchini seeds in professional packaging
- Cabbage seeds in professional packaging
- Pepper seeds in professional packaging
- Carrot seeds in professional packaging
- Beet seeds in professional packaging
- Radish seeds in professional packaging
- Cucumber seeds in professional packaging
Archive
Archive of products that are currently out of stock, but if they become available, we will easily move them to the appropriate sections. If you have landed on this page and see that a product is out of stock, you may be interested in other similar or related products—please use the search function on our website or browse other sections.
- Assortment 1


© sad-ogorod.biz.ua | Sad-Ogorod Agrostore — everything for home, garden and allotment, seeds, plant protection products. 2004 – 2026
Licence: series АЕ №294892
Licence: series АЕ №294892